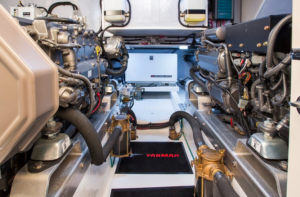
 This procedure is specific to KE52’s with Yanmar engines (all series). It’s mostly relevant to Cummins equipped vessels and in general would be consistent with Yanmar equipped 1st gen KE’s as well as those with Caterpillar engines.
Important Consideration
Strongly consider having your oil professionally sampled with regularity and keep the results. You will get an excellent return on this small investment when you go to sell your Krogen Express. In addition, oil sample results are invaluable in providing early warning to engine problems so they can be addressed before damage occurs and expensive repairs needed.
Things You’ll Need
- New primary and by-pass oil filters (2 each)
- 10 gals 15W-40 diesel oil
- Oil filter wrench (rubber strap type preferred)
- Funnel
- Masking tape
- Paper towels or rags
- Standard plastic grocery bags (4)
- 5-gallon buckets with lids (3) – or 2 5-gallon and a smaller trash can for filters
- Oil sampling kit (optional)
- Sharpie
- Screwdriver or awl
- Ratchet w/ 13 mm socket (only for new Yanmar 440 hp common rail engines)
Procedure
- Check the oil in both engines prior to starting them to get a baseline to help you determine how much new oil to add once drained.
- Yanmar recommends starting the engines and letting them run for a few minutes to warm the oil so it flows better (recommended). As a guideline, watch the temperature gauges and let them reach between 95 and 100 degrees. Once they’ve warmed up sufficiently, turn the engines off at both the Yanmar stop switches and the panel breakers or key switches for additional safety. If there’s any chance of someone else trying to start them while oil is being changed, put a sign at the helm to prevent this.
- Remove the oil filler cap to allow air to enter for more efficient draining.
- On new 440 hp common rail engines, remove the 5 cap nuts (13 mm) on the engine beauty cover and remove or rotate out of the way to port to allow access to the forward (bypass) oil filter.
- Poke small holes in the top of each filter with a screwdriver or awl to allow them to more fully drain.
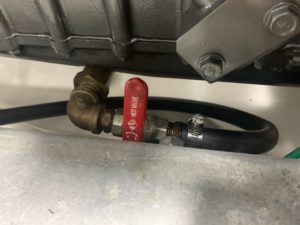
- Open the ball valve at the bottom of the engine pan by turning the handle 90 degrees so it’s inline with the hose (typically horizontal).

Oil Drain Valve (closed)
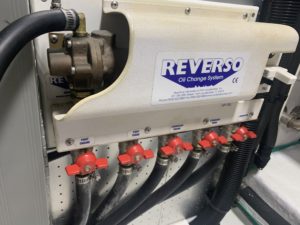
- Place the Reverso fill/discharge hose into a bucket. CAUTION: Be sure to secure the oil discharge line either by holding onto it or inserting it into a smaller hole in the lid of bucket. While the pump is working, there is more than enough pressure to push the hose out of the bucket. You don’t want this!

Reverso System
- When you’re ready, hose secured, open the valve on the Reverso for the corresponding engine, then flip the switch on the Reverso in the DRAIN direction. Run the pump until oil no longer flows, then turn off the Reverso and plug the discharge line to prevent dripping. Stow the line temporarily with end high to prevent oil from dripping. Close the engine valve on the Reverso.
- Close the ball valve at the bottom of the engine by turning the handle 90 degrees so it’s perpendicular to the drain line (typically vertical).
- Place a small piece of masking tape over the holes in the filters.
- Stuff a small, folded piece of paper towel in the drain cups below the filters and slide a standard plastic grocery bag around the filter.
- Working around the bag, loosen the filter with the wrench. As it loosens, work the grocery bag from the bottom up into the slot between the filter and the sealing surface of the filter. This will catch most, if not all, drips below the filter.
- Remove the filter and stand it upright in the bag to reduce dripping as you remove it from engine. Then drain as much oil as possible out of the filter into the open bucket and then place it in another bucket or trash can, standing it upright so it won’t drain further. Repeat for the second filter.
- Using either dirty oil or fresh, lubricate the new oil filter gaskets with a small amount of oil simply by dipping your finger in the oil and wiping it onto the gasket.

Yanmar Bypass Oil Filter (35400)

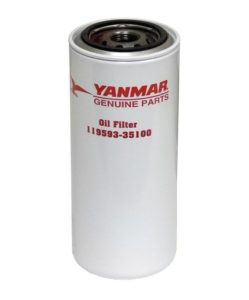
Yanmar Full Oil Filter (35100)
- Install the new filters. Once the gasket touches, tighten another ¾ turn by hand or with the oil filter wrench to secure it.
- Add the appropriate amount of oil either by pouring in the top fill (our preference) or using the Reverso, taking care not to overfill. To verify correct level, start the engine and run very briefly (1 to 2 minutes) to allow oil into the filters and other cavities that don’t easily drain down. Then shut the engine off and check the level after about 10 minutes to allow drain back. Add oil as necessary to bring level up to top mark. Again, take care not to overfill. The capacity is 19.8 quarts (just under 5 gallons) but since some oil remains in the engine when draining, it’s likely you’ll find that between 4 and 4 ½ gallons of new oil will bring it up to the full mark on the dipstick.
- Check oil when cold the next day to confirm proper levels, and daily as you’re running your KE52’.
- Mark hours and date of service on filters with a Sharpie for reference.
- Repeat procedure for second engine.
Here is a link to our YouTube video on the oil change procedure:
If you have any questions, concerns, or need assistance, feel free to call us. We are ALWAYS here for you!
